Getting started
Getting started with Threat Dragon models.
Create a new model
Using the Web application

The Threat Dragon web applications stores its threat models on your local drive and, depending on configuration, it can also store the models on drives or in source code repositories such as GitHub / GitLab Bitbucket. When getting started with Threat Dragon it is useful to test access to the configured repository, in which case click on ‘Login with Github’ for example.
To create a new threat model access the welcome page and start a new model by clicking on the plus area of the Welcome page.
You will then be presented with a list of your repositories. Pick the one where you want to store your new model. If you have more than 30 repos you might have to page through them until you find the one you want.
Once you have picked your target repo, you will be asked to pick a branch. Again, if you have more than 30 branches you might need to page through.
When you pick a branch you will be taken to the threat model edit page where you can enter general information about your model. The name that you provide for the model will be used as the file name within the repository.
Session timeout : when logging in to an external drive or repository, be aware that sessions can time out. This timeout length can be different according to the repository / drive provider; if this is a problem then ensure the session is kept alive using a tab in the same browser window.
Using the Desktop application
The Threat Dragon desktop variant stores its threat models on your local filesystem only, so click on ‘Start Threat Dragon’ to access the Welcome screen.
To get started with your threat model select the plus area of the Welcome page, or use the pull down menu ‘File -> New Model’. You are then asked to save the model file; this ensures the model can be saved.
You will then be taken straight to the threat model edit page where you can enter general information about your model.
Threat model edit page
The Title field is mandatory. All the rest are optional, but they provide context for your model. This can be useful if someone else has to pick the model up in the future. Click on the Edit button to start editing the threat model details.
- Title - mandatory, all other fields are optional
- Owner - typically a dev team or an individual
- Reviewer - only one reviewer at present
- High level system description - provides context for your model
- Contributors - giving credit where it is due
You can add new contributors by entering their name and clicking on the ‘Add’ in the tag box. You can also add the contributor by entering their name and hitting the ‘enter’ or ‘,’ or ‘;’ keys.

Add some diagrams to your model by clicking on ‘Add a new diagram …’
Name your diagram and then Add to confirm or Cancel if you change your mind. At this stage you are just listing the diagrams and naming them, the diagram elements are added later.
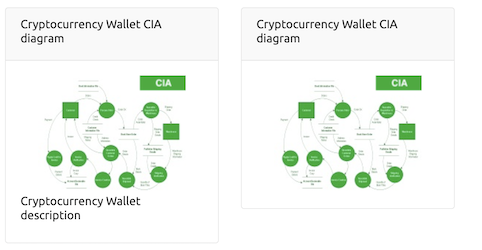
When adding a diagram there is a description field; this does not have to be filled out but if present it will be added to the bottom of the diagram icon and to any reports generated. Note that the diagram shown is not a thumbnail, it is an icon of a notional threat model according to the diagram type.
Once you have entered all the details you need remember to click Save. Reload will undo any changes and revert to your last save, Close gets back to the main page.
In the web variant of Threat Dragon, models are saved in your chosen branch
using the model title in the file path and file name:
ThreatDragonModels/[model name]/[model title].json.
This means that if you change title of your model it will delete the old model
and replace it with one at the new file path and file name.
This does not apply to the desktop variant.
Congratulations! You have got the basics done. Next step … mapping out your system in a diagram.
Loading a sample model
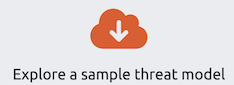
Threat Dragon supplies sample threat models that can be used as starting points. Click the Explore a sample model area on the Welcome page to browse the various models.
Threat Dragon provides a range of sample threat models, many of them transcribed from the Threat Model Cookbook project :
- Demo Threat Model, the classic web application model from the beginning of Threat Dragon
- Husky AI, a direct import of a TM-BOM file displayed as though it was a Threat Dragon file
- Cryptocurrency Wallet, threats and diagram for a wallet system
- Generic CMS, a diagram for a Content Management System (CMS)
- IoT Device, one perspective on an Internet of Things device and the threats
- Online Game, a diagram to get you started
- Payments Processing Platform, diagram only with no threats added
- Renting Car Startup, a diagram for car rental based on the mobile / cell phone network
- Three Tier Web Application for the classic client, server and database
- New Blank Model is exactly that: a bare-bones empty model
These models can provide ideas on how to get started and have diagrams, model details and threats as examples.
The security community is adding threat models are also being added to the Threat Model Library project in TM-BOM format. These models can be read directly by Threat Dragon and edited.
Opening an existing model
Web application
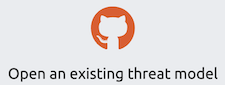
If you have a repository that already has threat models, you can open them by clicking on the open area on the Welcome page.
You will be able to select a repository and branch, and then presented with a list of models to make your selection.
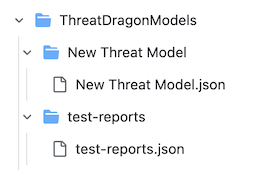
Note that Threat Dragon is fairly strict on where the threat models can be stored. The threat models must be under a parent directory called ‘ThreatDragonModels’ and the JSON file must then be stored in a sub-directory with the same name as the model.
As an example, shown is a directory containing two models ‘test-reports’ and ‘New Threat Model’ under the directory ‘ThreatDragonModels’. This directory structure has been carried over from Threat Dragon versions 1.x, and in future it may become less strict.
Desktop application
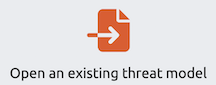
If you have an existing model file saved locally, you can open it by clicking on the open area on the Welcome page.
You will then be able to navigate to the model file in your local file system and open it.
Threat model report
From the Threat Model details view you can see a summary report of your model listing the diagrams, elements and threats. Towards the bottom right of the page click on the Report button.
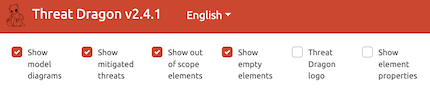
You can then customise the report to show :
- Threat model diagrams
- Mitigated threats
- Out of scope model elements
- Empty model elements
- Threat Dragon logo, default is hidden
- Element properties, not shown by default
On the desktop variant of Threat Dragon you can Print the report or save it as a PDF Report.
Using the web variant, you can Print the report to a printer. Most browsers will also allow you to save the report as a PDF from this print dialog.
Threat Dragon: making threat modeling less threatening